Quantcast
Channel: Backup Activity
Viewing all 107 articles
Browse latest View live

Broadcom Released Brocade® SANnav Management Portal and SANnav Global View

$
0
0
Broadcom has officially released the pairing of new suite software for empowering the IT administrators to be more efficient and productive by providing comprehensive visibility into the SAN environment. These software are : Brocade® SANnav Management Portal and SANnav Global View.  These tools transform information about SAN behavior and performance into actionable insights, allowing administrators to quickly identify, isolate and correct problems before they impact the business. 

In addition, SANnav Management Portal and SANnav Global View accelerate administrative tasks by simplifying workflows and automating redundant steps, making it easier for organizations to realize their goal of an autonomous SAN.

By Using SANnav Management Portal, the IT Administrator has many advantages as follow:

  • Simplified Management, Modern UI, with a user workflow focus to dramatically simplify SAN management
  • Enhanced Monitoring, Modern customizable heatlth, performance, event, inventory, security and status dashboards
  • Rapid Troubleshooting, Instant view of fabric-wide conditions, powerful log analysis, historical and real-time data
  • In-context topology Views, View fabric topology based on context of host, target, fabric, zone, etc

With SANnav Global View, the IT Administrator could quickly visualize the health, performance, and inventory of all the fabrics across all SANnav Management Portals using a simple, intelligent dashboard.

Product Highlights
• Streamline workflows to accelerate the deployment of new applications, switches, hosts, and targets
• Transform information into actionable insights to quickly identify and isolate problems
• Quickly visualize and isolate points of interest with simple-tounderstand topology views
• Minimize manual tasks by automating data collection and reporting
• Capture SAN telemetry data and translate it into visual health and performance dashboards
• Easily navigate the entire SAN from a global view down to local environments
• Automate the identification and reconfiguration of out-ofcompliance fabrics and switches
• Increase workflow efficiencies with an intuitive one-click navigation


Server requirement for running these software in your environment.


Server Requirements (Single-Host Deployment)

Product/EditionMax. Switch Ports/Instances
Under Management
Operating SystemHost TypeCPUMemoryHard Disk
Brocade SANnav Management
Portal Base Edition
600Red Hat Enterprise Linux 7.4Bare Metal/ESXi VM16 cores48 GB600 GB
Brocade SANnav Management
Portal Enterprise Edition
Up to 3000Red Hat Enterprise Linux 7.4Bare Metal/ESXi VM32 cores48 GB600 GB
Between 3000 to 15,000Red Hat Enterprise Linux 7.4Bare Metal/ESXi VM16 cores96 GB1.2 TB
Brocade SANnav Global ViewUp to 6 SANnav Management
Portal instances
Red Hat Enterprise Linux 7.4Bare Metal/ESXi VM16 cores32 GB300 GB


Server Requirements (Multi-Host Deployment)

Product/EditionMax. Switch Ports/Instances
Under Management
Operating SystemNumber of Hosts/Nodes in ClustersHost TypeCPUMemoryHard Disk
Brocade SANnav Management
Portal Enterprise Edition
600Red Hat Enterprise Linux 7.43Bare Metal/ESXi VM16 cores48 GB600 GB


Source: https://www.broadcom.com


Netbackup 8.1.2 Pre-Defined Roles

$
0
0
Since NetBackup 8.1.2, Veritas introduced a new web user interface that provides user to access the Master server of Netbackup via browser. From this web UI, the users have a dashboard that displays a quick overview of the information that is important to backup operation. By this web UI, the administrator could configure user access to Netbackup by Role-based access control (RBAC) mechanism. By RBAC mechanism, the administrator could delegate for tasks like NetBackup security management, protection plan configuration and job management, and protection and recovery of assets to other person.


By default, there are three pre-defined Roles shipped out-of-the-box to get you up and running quickly. There roles are : Backup administrator, Security administrator and Workload administrator.

NetBackup Security administrator
The NetBackup security administrator performs the following tasks in the NetBackup environment:

  • Manages role-based access control. This user can delegate access to NetBackup. This task includes managing the users that can access NetBackup, the role or permissions that users have, and the NetBackup assets that users can access.
  • Oversees the security management. This task includes managing NetBackup hosts and certificates, managing global security settings, and viewing security events.

Backup administrator

  • The backup administrator performs the following tasks in the NetBackup environment:
  • Manages all jobs activity. Monitors all job operations. Able to cancel, suspend, resume, restart, and delete jobs.
    The backup administrator can also configure NetBackup to send email notifications to their ticketing system when certain job failures occur.
  • Configures protection plans for the workload administrator.
  • Views the usage reporting details on backup data size for NetBackup master servers.
Administrator can limit access (through object groups) for users with the Backup administrator role or with a custom role. However, you cannot limit the jobs that a backup administrator can see. Users with this role can view all job activity.

Workload administrator
The workload administrator performs the following tasks in the NetBackup environment:

  • Manages the jobs that they initiate.
  • Manages the assets they are granted access to. Configure assets in the NetBackup environment including cloud providers, application servers, and
  • asset groups.
  • Monitors protection status and subscribes assets to protection plans.
  • Performs the recovery for assets they manage. You can limit access (through object groups) for users with the Workload administrator role.

The NetBackup Web UI is compatible with the latest vendor-supported versions of web browsers.
For the best experience with the NetBackup Web UI, Veritas recommends that you use Google Chrome version 60 or later or Mozilla Firefox version 65 or later, without any plug-ins. 


Source: Netbackup 8.1.2 Web UI Guide Security Admin

How To Install Oracle Java on Ubuntu 18.04

$
0
0
The dependence of many softwares on Java and JVM is very large, currently many applications/ software that runs on Java and JVM, including: Tomcat, Jetty, Glassfish, etc. At this article we will show you how to Install Oracle Java on Ubuntu Linux, especially for Ubuntu version 18.04. The Oracle Oracle Java 12 was released on end of July 2019 and we will try to download and install it on this machine.

Now we can easily install the Oracle Oracle Java 12 via Personal Package Archives (PPA) in Ubuntu 14.04, Ubuntu 16.04, Ubuntu 18.04, Ubuntu 18.10, or higher version. At this article we are using the PPA from “Linux Uprising” team, where the installer script will automatically downloads java package from Oracle web server, and installs it on the system.

Here's the step for Install Oracle Java 12 on Ubuntu 18.04 :

  • To add the PPA, open terminal either from app launcher or by pressing Ctrl+Alt+T on keyboard. When it opens, run command: sudo add-apt-repository ppa:linuxuprising/java.Then rcommands  Then run commands below to start the install the script to start downloading and installing Java 12 on your Ubuntu: sudo apt-get updateand then
    sudo apt-get install oracle-java12-installer
  
 
The console will be prompted like this.

  •  
    Finally check Java version via command line :
    java -version
     
     
    This tutorial is only very easy to be executed. Good luck. 


How to Uninstall and Remove Apahce2 on Ubuntu 18.04

$
0
0
Atleast, there are two pupular web service known so far, namely : Apache and Nginx. Sometime we need to install one of them, but sometimes we need they are running together, and sometimes we need install and uninstall all together. At this article, I will explain how to uninstall and remove the Apache2 from Ubuntu.

It seems that uninstalling Apache2 isn't as easy as putting in it. you'll have to be compelled to take away Apache2 package itself, moreover as different dependent packages and its associated configurations. Here is however you take away Apache2 cleanly on Ubuntu and Debian.

The first step is to prevent any running instance of Apache2, as a result of Apache2 won't be properly removed whereas it's running. We check the apache2 service is running and than stop it with this commands :

$ sudo service apache2 stop 


$ sudo service apache2 stop 
 
 
Then uninstall Apache2 and its dependent packages. Use purge possibility rather than take away with apt-get command. the previous possibility can try and take away dependent packages, similarly as any configuration files created by them. additionally, use autoremove possibility similarly, to get rid of the other dependencies that were put in with Apache2, however are not any longer utilized by the other package.

$ sudo apt-get purge apache2 apache2-utils apache2.2-bin apache2-common
$ sudo apt-get autoremove 


Finally, check if there's any configuration files or manual pages happiness to Apache2, that square measure still not removed.

$ whereis apache2 


In this instance, /etc/apache2 directory still exists. Since this directory (as well as any configuration files in it) isn't any longer necessary, move and take away it manually.

$ sudo rm -rf /etc/apache2 


I hope it can help you on installing the Apache2 web service from your Ubuntu system.

NetApp Released The NetApp AFF A-Series All Flash Arrays

$
0
0
NetApp has released the all flash storage, named as NetApp All Flash FAS (AFF) system to address the enterprise storage requirements with high performance, superior flexibility, and best-in-class data management. Built on ONTAP® data management software.

NetApp AFF has several models, namely : AFF A200, AFF A300, AFF A700 and AFF A700s. The NetApp AFF A200 is  an entry point to NetApp's enterprise flash storage portfolio. It size is 2U chassis with two HA controllers and 24 SSD slots and the AFF A700 is the highest level of AFF.


Key Benefit of NetApp AFF Series
  • Accelerate applications with the fastest unified scale-out all-flash array of up to 7M IOPS at submillisecond latency and over 360PB effective capacity.
  • Transform your data center economics with best-in-class flash density: a complete flash system of 1PB in a 4U compact enclosure.
  • Reduce power use by 11 times and rack space by 19 times and cut support costs by 67%.
  • Unify data management for both SAN and NAS environments, from flash to disk to cloud.
  • Provision storage system and serve data within 10 minutes.
  • Reduce SSD storage by 5 to 10 times on average with inline data reduction technologies.
  • Remove network bottlenecks with high-speed connectivity of 32Gb FC and 40Gb Ethernet.
  • Safeguard your data with the best-in-class integrated data protection suite.

The Capability of AFF systems :
 Accelerate the speed of business while increasing operational efficiency:
  • Built on the flash-optimized NetApp WAFL® (Write Anywhere File Layout) system, ONTAP FlashEssentials enables consistent high performance to meet the demands of a multitude of workloads in a shared environment.
  • Consolidate all your workloads on the AFF systems, which deliver up to 600,000 IOPS at 1ms latency.
  • You can manage a massively scalable NAS container of up to 20PB and 400 billion files with a single namespace using FlexGroup volumes, while maintaining consistent high performance and resiliency.
Simplify IT operations while transforming data center economics:
  • You can reduce power consumption by up to 11 times and rack space by up to 19 times and slash support and performance-tuning costs to a third compared with hybrid
  • systems.
  • You can get flash at the cost of HDDs, thanks to NetApp data reduction technologies, enhanced with new inline data compaction.
  • Support all your backup and disaster recovery needs with a complete suite of integrated data protection and replication features.
  • Secure your data and simplify key management on any type of drive with NetApp Volume Encryption (NVE), software-based at-rest data encryption, and onboard  key manager.
Deploy flash everywhere with maximum flexibility while retaining control and security of your data:
  • You can move data and applications where they run best:  on an AFF system, on commodity hardware with soft
  • ware-defined storage, or in the cloud.
  • AFF offers the broadest application ecosystem integration for enterprise applications, VDI, database, and server virtualization.
  • Integrate flash into your infrastructure nondisruptively, eliminating silos, and scale out as your requirements grow
 Source : http://www.netapp.com/us/products/storage-systems

What is New in Netbackup 8.3

$
0
0


NetBackup 8.3 is a feature-rich release providingunified data protection from Edge to Core to Cloud to optimize business resiliency, recover at scale, protect any workload, and reduce risk.

    • Strengthen Ransomware Resiliency – Outsmart and prevent ransomware with hardened security, Vendor-agnostic immutability for storage utilizing NetBackup OpenStorage Technology (OST) and orchestrated rehearsals.
    • Integrations with  CloudPoint  and Veritas Resiliency Platform, VRP  –  Freedom to control cloud data protection and disaster recovery directly from NetBackup, proactively ensuring resiliency for applications across your heterogeneous environment.
    • Cloud-to-anywhere – Seamless workload and data portability in the cloud including Azure Stack to Azure Stack and Azure region-to-region—with orchestrated disaster recovery using VRP integration.
    • Expanded Workloads Support – Total control of discovery, backup, restore, and automation at scale for Microsoft SQL, Oracle, and Oracle Real Application Clusters (RAC) for simplified management.


    Other new features in NetBackup 8.3

    • Universal Shares includes new form factor support and enhanced management, now available for both appliances and BYO media servers. 
    • Instant access  for SQL Databases and BYO (build your own).
    • Expanded workload capabilities such as Microsoft SQL Self-Service.
    • MSDP direct cloud tiering and manage data in multiple buckets, storage tiers and cloud providers from a single node.
    • Image sharing in the cloud and support for Azure and S3 compatible object storage.
    • Object storage support for client-side deduplication for writing directly to cloud storage.
    • Cloud Snapshot enabling granular recovery.


    Source : https://www.veritas.com

    Veritas NetBackup 8.1.2 Alert Notification Status Codes

    $
    0
    0

     Here is the list fo Veritas Netbackup 8.1.2 Alert Notification Status Codes. These codes are very useful where Backup Administrartor needs to escalate the problem or failure which was happened on Netbackup backup system.  The information is taken from Netbackup812 Reference Guide status code release 8.1.2.  Since NetBackup supports the ticketing systems, the status code can be delivered automatically to the Backup Administrator based on inbound email services. Netbackup support many ticketing system, such as : ServiceNow, Remedy, or HP Service Manager (HPSM).

    Status code | Error message
    1 The requested operation was partially successful
    2 None of the requested files were backed up
    6 The backup failed to back up the requested files
    9 A necessary extension package is not installed or not configured properly
    10 Allocation failed
    11 System call failed
    12 File open failed
    13 File read failed
    14 File write failed
    20 Invalid command parameter
    21 Socket open failed
    23 Socket read failed
    24 Socket write failed
    25 Cannot connect on socket
    26 Client/server handshaking failed
    27 Child process killed by signal
    28 Failed trying to fork a process
    29 Failed trying to exec a command
    35 Cannot make required directory
    36 Failed trying to allocate memory
    37 Operation requested by an invalid server
    39 Client name mismatch
    40 Network connection broken
    41 Network connection timed out
    42 Network read failed
    44 Network write failed
    46 Server not allowed access
    47 Host is unreachable
    48 Client hostname could not be found
    49 Client did not start
    50 Client process aborted
    52 Timed out waiting for media manager to mount volume
    54 Timed out connecting to client
    58 Can’t connect to client
    59 Access to the client was not allowed
    61 The vnetd proxy encountered an error
    63 Process was killed by a signal
    67 Client backup failed to read the file list
    69 Invalid filelist specification
    71 None of the files in the file list exist
    72 The client type is incorrect in the configuration database
    74 Client timed out waiting for bpstart_notify to complete
    83 Media open error
    84 Media write error
    85 Media read error
    86 Media position error
    87 Media close error
    89 Problems encountered during setup of shared memory
    90 Media manager received no data for backup image
    93 Media manager found wrong tape in drive
    96 Unable to allocate new media for backup, storage unit has none available
    98 Error requesting media (tpreq)
    103 Error occurred during initialization, check configuration file
    112 No files specified in the file list
    114 Unimplemented error code
    129 Disk storage unit is full
    130 System error occurred
    142 File does not exist
    154 Storage unit characteristics mismatched to request
    155 Disk is full
    156 Snapshot error encountered
    158 Failed accessing daemon lock file
    159 Licensed use has been exceeded
    174 Media manager – system error occurred
    190 Found no images or media matching the selection criteria
    191 No images were successfully processed
    196 Client backup was not attempted because backup window closed
    198 No active policies contain schedules of the requested type for this client
    200 Scheduler found no backups due to run
    213 No storage units available for use
    219 The required storage unit is unavailable
    227 No entity was found
    232 A protocol error has occurred
    233 Premature eof encountered
    636 Read from input socket failed
    800 Resource request failed
    806 This mpx group is unjoinable
    811 Failed to communicate with resource requester
    818 Retention level mismatch
    1002 Discovery detected a failed client
    1542 An existing snapshot is no longer valid and cannot be mounted for subsequent operations
    2000 Unable to allocate new media for backup, storage unit has none available.
    2001 No drives are available for this job
    2002 Invalid STU identifier type
    2003 Drive is not allocated.
    2004 Drive is already allocated
    2005 MDS has received an invalid message from a media server.
    2006 NDMP credentials are not defined in EMM.
    2007 Storage unit is not compatible with requesting job
    2008 All compatible drive paths are down
    2009 All compatible drive paths are down but media is available
    2010 Job type is invalid
    2011 The media server reported a system error
    2012 Media has conflicts in EMM
    2013 Error record insert failed
    2014 Media is not assigned
    2015 Media is expired
    2016 Media is assigned to another server
    2017 Media needs to be unmounted from a drive
    2018 Number of cleanings is invalid
    2019 Media is in a drive that is not configured on local system
    2020 Robotic library is down on server
    2021 Allocation record insert failed
    2022 Allocation status record insert failed
    2023 Allocation identifier is not known to EMM
    2024 Allocation request update failed
    2025 Allocation request delete failed
    2026 Allocation status request delete failed
    2027 Media server is not active
    2028 Media is reserved
    2029 EMM database is inconsistent
    2030 Insufficient disk space or high water mark would be exceeded
    2031 Media is not defined in EMM
    2032 Media is in use according to EMM
    2033 Media has been misplaced
    2034 Retry the allocation request later
    2035 Request needs to pend
    2036 Drive is in a robotic library that is up
    2037 Drive is not ready
    2038 Media loaded in drive is not write-enabled
    2039 SCSI reservation conflict detected
    2040 Maximum job count has been reached for the storage unit
    2041 Storage unit is down
    2042 Density mismatch detected
    2043 Requested slot is empty
    2044 Media is assigned to another application
    2045 Storage unit is disabled since max job count is less than 1
    2046 Media is unmountable
    2047 Media is write protected
    2048 Media is in use by the ACS robotic library
    2049 Media not found in the ACS robotic library
    2050 ACS media has an unreadable external label
    2051 ACS media is not in the drive’s domain
    2052 An ACS Library Storage Module (LSM) is offline
    2053 Media is in an inaccessible drive
    2054 Media is in a drive that is currently in a DOWN state
    2055 ACS physical drive is not available
    2056 The file name used for the mount request already exists
    2057 The scan host of the drive is not active
    2058 LTID needs to be restarted on media servers before the device can be used
    2059 The robotic library is not available
    2060 Media needs to be rewound or unmounted from a drive
    2061 The host is not an active node of a cluster
    2062 Throttled job count has been reached for the storage unit
    2063 Server is not licensed for the Remote Client Option
    2064 Job history indicates that no media is available
    2065 Job history indicates that no drive is available
    2066 Disk pool not found
    2067 Disk volume not found
    2068 Disk volume mount point not found
    2069 Disk volume mount point record insert failed
    2070 The specified mount path will not fit in the allocated space
    2071 Unable to find any storage servers for the request
    2072 Invalid operation on static mount point
    2073 Disk pool is down
    2074 Disk volume is down
    2075 Fibre Transport resources are not available
    2076 DSM returned an unexpected error
    2077 DSM has already mounted the volume
    2078 The maximum number of mounts for the disk volume have been exceeded
    2079 DSM has detected that an invalid file system is mounted on the volume
    2080 Disk volume has no max writers count
    2081 Disk volume has no max readers count
    2082 The drive needs to be marked as available
    2083 The media affinity group is not defined in EMM
    2084 Media affinity group record insert failed
    2085 Disk volume is not available
    2086 Disk volume cannot be used for more than one copy in the same job
    2087 Media allocation would exceed maximum partially full media limit
    2088 Cleaning media is not available
    2089 FT client is not running
    2090 FT client has no devices configured
    2091 FT client devices are offline
    2092 FT server devices for client are offline
    2093 No FT servers for this client are running
    2094 STU cannot run Lifecycle backups
    2095 STU cannot run VMware backup
    2096 NDMP operation does not support multiple inline copies
    2097 Storage unit group does not exist in EMM configuration
    2098 Media pool is not eligible for this job
    2099 Required drive or drive path is not configured
    2100 Maximum number of mounts has been exceeded for tape media
    2101 Media server not found in EMM database
    2102 Storage unit does not support spanning
    2103 Media server mismatch
    2104 Storage units are not available
    2105 Storage unit requested for replication job is not replication capable
    2106 Disk storage server is down
    2107 Requested media server does not have credentials or is not configured for the storage server
    2108 Requested NDMP machine does not have credentials or is not configured in NetBackup
    2109 Requested Fibre Transport client machine was not found in NetBackup configuration
    2110 Requested machine is not configured in NetBackup
    2111 All storage units are configured with On Demand Only and are not eligible for jobs requesting ANY storage unit
    2112 NetBackup media server version is too low for the operation
    2113 Invalid or no disk array credentials are added for vserver
    2505 Unable to connect to the database
    4200 Operation failed: Unable to acquire snapshot lock
    4201 Incorrect snapshot method configuration or snapshot method not compatible for protecting backup selection entries
    4202 Invalid or incompatible storage unit configured
    4203 Invalid or unsupported entry found in backup selection filelist
    4204 Incompatible client found
    4205 Incorrect or no credentials found
    4206 Authentication error occurred. NetBackup Client Service is running as Local System, this is likely incorrect.
    4207 Could not fetch snapshot metadata or state files
    4208 Could not fetch snapshot metadata or state files
    4209 Snapshot metadata or statefiles cannot be created
    4210 Incorrect or no content found in snapshot metadata
    4211 Snapshot not accessible or invalid snapshot
    4212 Recreation of snapshot failed
    4213 Snapshot import failed
    4214 Snapshot mount failed
    4215 Snapshot deletion failed
    4216 Snapshot cleanup failed
    4218 Snapshot deport failed
    4219 Command operation failed: Third-party command or API execution failed
    4220 Command operation failed: System command or API execution failed
    4221 Found an invalid or unsupported configuration
    4222 Operation failed: Unable to acquire policy lock to take snapshot
    4223 Operation not completed
    4224 STS Internal Error
    4225 Unauthorized operation attempted by client or media on storage server
    4226 Communication failure occurred with storage server
    4227 STS Plug-in error occurred
    4228 Storage server or plug-in version mismatch
    4229 Insufficient resources or capabilities found by storage server
    4230 Invalid storage topology or storage server configuration error
    4231 STS Unexpected Error
    4232 Invalid Discovery Query URI
    4233 BIOS UUID client reference not allowed for vCloud
    4234 VMware server login failure
    4235 vCloud keyword used when vCloud not enabled
    4236 vCloud policy includes multiple organizations
    4237 Client does not meet policy requirements
    4238 No server credentials configured for policy
    4239 Unable to find the virtual machine
    4240 Operation not supported
    4241 Block-level incremental backups are not supported for this device
    4243 Unable to connect to VirtualCenter server
    4245 Invalid pathname for backup selection
    4246 The requested operation was partially successful.
    4248 Index from snapshot operation failed with an internal error
    4249 Index from snapshot operation failed, catalog already exists
    4250 Index from snapshot operation failed, unable to find child image or file information
    4251 Index from snapshot operation failed. Failed to write into index database.
    4252 Index from snapshot operation failed. Entry does not belong to any of the backup selection entries.
    4253 Index from snapshot operation failed. SLP version mismatch for current and previous backup image.
    4254 Invalid or no path found to create index database
    4255 Index from snapshot using SnapDiff is disabled by the user
    4256 Index from snapshot is not supported for the file system associated with backup selection
    4257 Index from snapshot is not supported for the storage server
    4258 Transient error encountered while taking Hyper-V VM snapshot.
    4259 Failed to find VirtualCenter host name in VMware Lookup Service
    4260 Encountered SSO login failure
    4261 Encountered VMware Internal Server Error
    4262 Encountered VMware vCloud Suite API failure
    4263 Encountered VMware SOAP API failure
    4264 Encountered unexpected error while processing TagView XML
    4265 Encountered a VMware Virtual Machine Server that does not support Tags
    4266 Encountered a VMware Virtual Machine Server that does not offer Tag APIs
    4267 Failed to initialize Java Runtime Environment
    4268 Failed to retrieve resource pool information
    4269 Found multiple virtual machines with same identity
    4271 Maximum virtual machine snapshots exceeded
    4272 Maximum delta files exceeded
    4273 Unable to lock the backup or restore host for virtual machine snapshot operations
    4274 Failed to remove virtual machine snapshot
    4275 Unable to consolidate Virtual Machine Disks
    4276 Unable to retrieve Virtual Machine Disk information
    4277 Virtual machine path contains unsupported characters
    4278 Unable to retrieve virtual machine information
    4279 Unable to retrieve virtual machine vCloud information
    4280 Virtual machine contains independent and Raw Device Mapping disks only
    4281 Virtual machine contains independent disks only
    4282 Virtual machine contains Raw Device Mapping disks only
    4283 Error detected while processing disk identifiers
    4290 Failed to create virtual machine snapshot. Virtual machine is busy performing another operation.
    4292 Unable to activate change block tracking in current state of virtual machine
    4293 Invalid credentials or an access violation
    4294 The virtual machine is disconnected
    5402 OS Authentication error – Could not connect to the database. Please check the OS credentials
    5449 The script is not approved for execution
    7600 An unknown internal error occurred.
    7601 Failed to register service with PBX.
    7603 Failed to initialize PBX.
    7604 Failed to register PBX acceptor with the reactor.
    7607 Failed to set socket to non-blocking mode.
    7609 Failed to perform a reactor event handler operation.
    7610 Failed to parse the specified object.
    7611 A connection protocol error occurred.
    7612 An unexpected protocol event occurred.
    7613 A lookup failed for host.
    7614 No valid source-target bindings exist for host.
    7617 A JSON conversion error occurred.
    7618 Failed to find JSON key.
    7619 The specified state machine is still active.
    7622 Input I/O is required.
    7623 Output I/O is required.
    7624 A SSL socket accept failed.
    7625 A SSL socket connect failed.
    7627 SSL initialization failed.
    7628 VxSS initialization failed.
    7631 Certificate path lookup failed.
    7632 A protocol sanity verification failed.
    7633 The state machine was terminated before completion.
    7634 Failed to set up a UNIX Domain Socket listener for user.
    7635 Failed to create a local acceptor.
    7636 Failed to import socket from remote process.
    7637 Failed to export socket to remote process.
    7638 Failed to create a socket pair.
    7639 Failed to create a peer name mapping.
    7640 The peer closed the connection.
    7641 Failed to find a common CA Root for secure handshake.
    7642 Failed to verify Java GUI session token.
    7643 Connection cannot be established because the host validation cannot be performed.
    7645 Could not get name from certificate information.
    7647 Proxy peer does not conform to proxy protocol.
    7648 Connection cannot be established because the host validation failed.
    7649 Data retrieved from the cache is not in a valid format.
    7650 Data that is retrieved from the server is not in a valid format.
    7651 Could not process audit reason.
    7652 Secure communication proxy is not available for use.
    7653 The Peer Certificate is revoked
    7654 The Certificate Revocation List is invalid
    7655 Certificate Revocation List is signed incorrectly
    7656 Certificate Revocation List is out of date
    7657 Cannot identify service type of acceptor
    7658 Connection cannot be established because the host validation cannot be performed on the target host.
    7659 Connection cannot be established because the host validation failed on the target host.
    7660 The peer proxy cannot find usable certificates for the certificate protocol
    8500 Connection with the web service was not established
    8506 The certificate has expired


    How To Install UrBackup Server on Ubuntu 20.04 LTS

    $
    0
    0

     In this article we will learn how to install UrBackup, an Open Source client/server backup system on Ubuntu 20.04 LTS operating system.

    UrBackup is a free and oper source backup software which is widely used today. UrBackup is an easy to setup Open Source client/server backup system, that through a combination of image and file backups accomplishes both data safety and a fast restoration time. On this tutorial we will learn how to install UrBackup Server application on Ubuntu 20.04 LTS operating system.

    Installing UrBackup On Ubuntu 20.04 LTS

    UrBackup installation on Ubuntu Linux will be consist of several steps as mentioned below :

    • Adding UrBackup Repository
    • Updating System
    • Installing UrBackup Server Software
    • Accessing UrBackup Web

     1. Adding UrBackup Repository

    In this step, we will add UrBackup repository to our Ubuntu packages system. The UrBackup will be using ppa:uroni/urbackup repository. Adding repository by using command line :

    $ sudo add-apt-repository ppa:uroni/urbackup
     
    Output : 
     
    mpik@app01:~$ sudo add-apt-repository ppa:uroni/urbackup
    [sudo] password for mpik:
     Efficient Client-Server Backup system for Linux and Windows. A client for Windows lets you backup open files and complete partition images. Backups are stored to disks in a efficient way (deduplication) on either Windows or Linux servers.
     More info: https://launchpad.net/~uroni/+archive/ubuntu/urbackup
    Press [ENTER] to continue or Ctrl-c to cancel adding it.

    Get:2 http://security.ubuntu.com/ubuntu focal-security InRelease [114 kB]                                                
    Hit:3 http://ppa.launchpad.net/ondrej/php/ubuntu focal InRelease
    . . .
    Get:22 http://us.archive.ubuntu.com/ubuntu focal-backports/universe amd64 DEP-11 Metadata [10.4 kB]                       
    Fetched 4,313 kB in 19s (227 kB/s)                                                                                        
    Reading package lists... Done


     2. Updating System

     By updating system repository, we will refresh our Ubuntu system to the latest package version, this task is performed by submitting command line :
     
    $ sudo apt-get update
     
     Output :
     
    mpik@app01:~$ sudo apt-get update
    Hit:1 http://ppa.launchpad.net/ondrej/php/ubuntu focal InRelease                                                         
    Hit:2 http://us.archive.ubuntu.com/ubuntu focal InRelease                                                                
    Hit:4 http://security.ubuntu.com/ubuntu focal-security InRelease                                                         
    Hit:5 http://us.archive.ubuntu.com/ubuntu focal-updates InRelease                         
    Hit:6 http://ppa.launchpad.net/uroni/urbackup/ubuntu focal InRelease                                
    Get:7 https://dlm.mariadb.com/repo/mariadb-server/10.6/repo/ubuntu focal InRelease [6,264 B]        
    Hit:8 http://us.archive.ubuntu.com/ubuntu focal-backports InRelease                                            
    Hit:3 https://downloads.mariadb.com/Tools/ubuntu focal InRelease                                               
    Hit:9 https://downloads.mariadb.com/MaxScale/6.1.1/apt focal InRelease
    Fetched 6,264 B in 4s (1,665 B/s)
    Reading package lists... Done
     

     3. Installing UrBackup Server Software

    After updating Ubuntu 20.04 system, now we will install the UrBackup server using its Official PPA repository by issuing the following commands in the terminal.
     
     $ sudo apt-get install urbackup-server
     
    Output :
     
    mpik@app01:~$ sudo apt-get install urbackup-server
    Reading package lists... Done
    Building dependency tree       
    Reading state information... Done
    The following packages were automatically installed and are no longer required:
      libevent-core-2.1-7 libevent-pthreads-2.1-7 libmecab2 libzip5 mecab-ipadic mecab-ipadic-utf8 mecab-utils
    Use 'sudo apt autoremove' to remove them.
    The following additional packages will be installed:
      attr augeas-lenses btrfs-progs cpu-checker cryptsetup-bin db-util db5.3-util debootstrap dmeventd exfat-fuse
      exfat-utils extlinux f2fs-tools finalrd hfsplus ibverbs-providers icoutils ipxe-qemu ipxe-qemu-256k-compat-efi-roms
      kpartx ldmtool libafflib0v5 libaugeas0 libcacard0 libconfig9 libcrypto++6 libdate-manip-perl libdevmapper-event1.02.1
      libewf2 libf2fs-format4 libf2fs5 libfdt1 libguestfs-hfsplus libguestfs-perl libguestfs-reiserfs libguestfs-tools
      libguestfs-xfs libguestfs0 libhfsp0 libhivex0 libibverbs1 libintl-perl libintl-xs-perl libiscsi7 libldm-1.0-0
      liblvm2cmd2.03 libnetpbm10 librados2 librbd1 librdmacm1 libslirp0 libspice-server1 libstring-shellquote-perl
      libsys-virt-perl libtsk13 libusbredirparser1 libvirglrenderer1 libvirt0 libwin-hivex-perl libxml-xpath-perl libyara3
      lsscsi lvm2 lzop mdadm msr-tools netpbm osinfo-db ovmf qemu-block-extra qemu-system-common qemu-system-data
      qemu-system-gui qemu-system-x86 qemu-utils reiserfsprogs scrub seabios sharutils sleuthkit sqlite3 supermin
      thin-provisioning-tools xfsprogs zerofree
    Suggested packages:
      augeas-doc duperemove arch-test squid-deb-proxy-client libterm-readline-gnu-perl | libterm-readline-perl-perl
      augeas-tools libguestfs-gfs2 libguestfs-jfs libguestfs-nilfs libguestfs-rescue libguestfs-rsync libguestfs-zfs
      gstreamer1.0-plugins-ugly default-mta | mail-transport-agent dracut-core samba vde2 sharutils-doc bsd-mailx | mailx
      autopsy mac-robber sqlite3-doc xfsdump quota
    Recommended packages:
      linux-image-amd64
    The following NEW packages will be installed:
      attr augeas-lenses btrfs-progs cpu-checker cryptsetup-bin db-util db5.3-util debootstrap dmeventd exfat-fuse
      exfat-utils extlinux f2fs-tools finalrd hfsplus ibverbs-providers icoutils ipxe-qemu ipxe-qemu-256k-compat-efi-roms
      kpartx ldmtool libafflib0v5 libaugeas0 libcacard0 libconfig9 libcrypto++6 libdate-manip-perl libdevmapper-event1.02.1
      libewf2 libf2fs-format4 libf2fs5 libfdt1 libguestfs-hfsplus libguestfs-perl libguestfs-reiserfs libguestfs-tools
      libguestfs-xfs libguestfs0 libhfsp0 libhivex0 libibverbs1 libintl-perl libintl-xs-perl libiscsi7 libldm-1.0-0
      liblvm2cmd2.03 libnetpbm10 librados2 librbd1 librdmacm1 libslirp0 libspice-server1 libstring-shellquote-perl
      libsys-virt-perl libtsk13 libusbredirparser1 libvirglrenderer1 libvirt0 libwin-hivex-perl libxml-xpath-perl libyara3
      lsscsi lvm2 lzop mdadm msr-tools netpbm osinfo-db ovmf qemu-block-extra qemu-system-common qemu-system-data
      qemu-system-gui qemu-system-x86 qemu-utils reiserfsprogs scrub seabios sharutils sleuthkit sqlite3 supermin
      thin-provisioning-tools urbackup-server xfsprogs zerofree
    0 upgraded, 86 newly installed, 0 to remove and 406 not upgraded.
    Need to get 46.5 MB of archives.
    After this operation, 217 MB of additional disk space will be used.
    Do you want to continue? [Y/n] Y
    Get:1 http://ppa.launchpad.net/uroni/urbackup/ubuntu focal/main amd64 urbackup-server amd64 2.4.13.0-1ubuntu1~focal [3,531 kB]

     
     During the installation, we will be asked to provide the backup location as shown below :
     
     
    Setting backup location for UrBackup

     After all are set, then we will start UrBackup service to be running on the system, for this purpose we will do the following command lines.
     
    $ sudo systemctl start urbackupsrv
    $ sudo systemctl enable urbackupsrv
    $ sudo systemctl status urbackupsrv
     
     Output :
     
    mpik@app01:~$ sudo systemctl start urbackupsrv
    [sudo] password for mpik:
    mpik@app01:~$ sudo systemctl enable urbackupsrv
    urbackupsrv.service is not a native service, redirecting to systemd-sysv-install.
    Executing: /lib/systemd/systemd-sysv-install enable urbackupsrv

    mpik@app01:~$ sudo systemctl status urbackupsrv
    ● urbackupsrv.service - LSB: Server for doing backups
         Loaded: loaded (/etc/init.d/urbackupsrv; generated)
         Active: active (running) since Mon 2021-09-13 17:58:11 PDT; 1min 25s ago
           Docs: man:systemd-sysv-generator(8)
          Tasks: 17 (limit: 9436)
         Memory: 19.6M
         CGroup: /system.slice/urbackupsrv.service
                 └─1196 /usr/bin/urbackupsrv run --config /etc/default/urbackupsrv --daemon --pidfile /var/run/>

    Sep 13 17:58:11 app01.otodiginet.com systemd[1]: Starting LSB: Server for doing backups...
    Sep 13 17:58:11 app01.otodiginet.com systemd[1]: Started LSB: Server for doing backups.

     
     Until this step, UrBackup installation process has just done. Next step, we will configure UrBackup to make it run properly.   

    4. Accessing UrBackup Web Interface

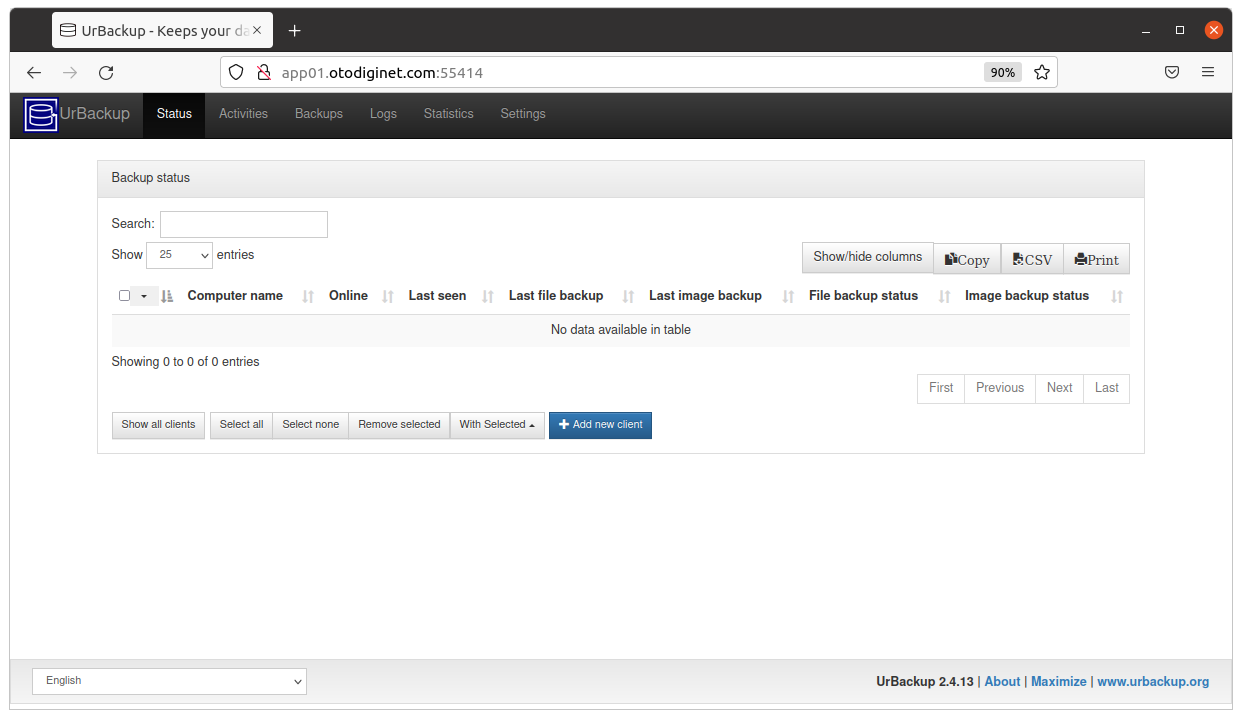
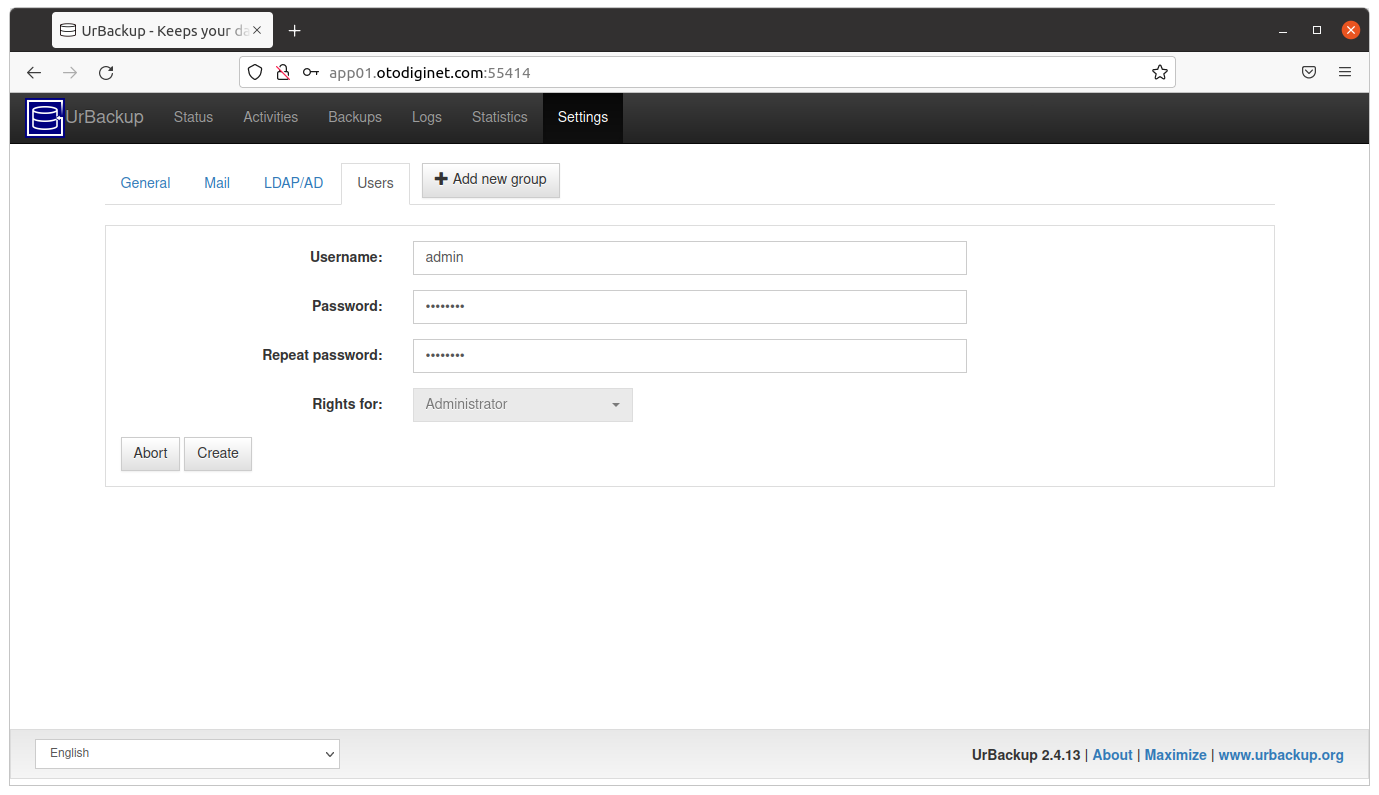
     By default UrBackup will use port 55414 for web interface. We will use web browser to access UrBackup web interface by typing url http://<ipaddress_server_or_server_hostname>:55414.


    Conclusion

     The UrBackup installation on Ubuntu 20.04 LTS operating system has been done properly. I hope this article will be helpful.

    How Do I Take Thread Dumps on Solaris 10 ?

    $
    0
    0
    Currently, many applications are using JVM for processing, the active process are divided into various java threads. The list of java threads that are currently active in the JVM is called as thread dump. Sometimes we are faced with a condition where the java thread is running not as it should be, then checks are needed for investigation. To check for java threads needed tools. There are several ways to take thread dumps from a JVM.

    For our case, we will use jstack with Solaris 10 environment as our case test. Here's how to take thread dump with jstack in a Solaris 10 environment.

    1. List the PID of all active java processes
    [joe01@testbed01]$ uname -a
    SunOS utest01 5.10 Generic_150400-30 sun4v sparc SUNW,SPARC-Enterprise-T5220
    [joe01@testbed01 ]$ ps -ef| grep java
    stystem  3498  3469   0   Sep 26 ?         550:55 /usr/jre1.6.0_07/bin/java -Dprogram.name=run.sh -server -Xms256m -Xmx3072m -XX:
    stystem  26440    1   0   Oct 05 ?          98:35 /app/st/jdk1.6.0_12/bin/java -server -Xmx1020M -XX:TargetSurvivorRatio=90 -X
    stystem 24938 24919   0 20:56:18 pts/5       0:00 grep java
    stystem  7233     1   0   Oct 05 ?         100:47 /app/st/jdk1.6.0_12/bin/java -server -Xmx1020M -XX:TargetSurvivorRatio=90 -X
    stystem  2073     1   0   Oct 05 ?          26:10 /app/st/jdk1.6.0_12/bin/java -server -Xmx1020M -XX:TargetSurvivorRatio=90 -X
    stystem  2842     1   0   Oct 05 ?          75:55 /app/st/jdk1.6.0_12/bin/java -server -Xmx1020M -XX:TargetSurvivorRatio=90 -X
    stystem  1284     1   0   Oct 05 ?          85:36 /app/st/jdk1.6.0_12/bin/java -server -Xmx1020M -XX:TargetSurvivorRatio=90 -X
    stystem 28953     1   0   Oct 05 ?         179:41 /app/st/jdk1.6.0_12/bin/java -Djava.security.properties=/app/st/jre1.7.0_


    2. Run the jstack to request thread dump from the JVM. The command line will be jstack -l
    [joe01@testbed01]pwd
    /app/rapcorp/jdk1.6.0_12/bin
    [joe01@testbed01]$ ls -ltr jstack
    -rwxr-xr-x   1 rapcorpadm rapcorp      47788 Apr 28  2016 jstack
    [joe01@testbed01]$ ./jstack -h
    Usage:
        jstack [-l]

            (to connect to running process)
        jstack -F [-m] [-l]

            (to connect to a hung process)
        jstack [-m] [-l]

            (to connect to a core file)
        jstack [-m] [-l] [server_id@]

            (to connect to a remote debug server)

    Options:
        -F  to force a thread dump. Use when jstack
    does not respond (process is hung)
        -m  to print both java and native frames (mixed mode)
        -l  long listing. Prints additional information about locks
        -h or -help to print this help message


    [joe01@testbed01]$ ./jstack -l 26440| more
    2017-10-25 15:50:37
    Full thread dump Java HotSpot(TM) Server VM (11.2-b01 mixed mode):

    "Attach Listener" daemon prio=3 tid=0x00afb400 nid=0x718d waiting on condition [0x00000000..0x00000000]
       java.lang.Thread.State: RUNNABLE

    [joe01@testbed01]$ ./jstack -F 25468
    ttaching to process ID 25468, please wait...
    Exception in thread "main" java.lang.reflect.InvocationTargetException
            at sun.reflect.NativeMethodAccessorImpl.invoke0(Native Method)
            at sun.reflect.NativeMethodAccessorImpl.invoke(NativeMethodAccessorImpl.java:39)
            at sun.reflect.DelegatingMethodAccessorImpl.invoke(DelegatingMethodAccessorImpl.java:25)
            at java.lang.reflect.Method.invoke(Method.java:597)
            at sun.tools.jstack.JStack.runJStackTool(JStack.java:118)
            at sun.tools.jstack.JStack.main(JStack.java:84)
    Caused by: java.lang.RuntimeException: Type "nmethodBucket*", referenced in VMStructs::localHotSpotVMStructs in the remote VM, was not present in the remote VMStructs::localHotSpotVMTypes table (should have been caught in the debug build of that VM). Can not continue.
            at sun.jvm.hotspot.HotSpotTypeDataBase.lookupOrFail(HotSpotTypeDataBase.java:361)
            at sun.jvm.hotspot.HotSpotTypeDataBase.readVMStructs(HotSpotTypeDataBase.java:252)
            at sun.jvm.hotspot.HotSpotTypeDataBase.(HotSpotTypeDataBase.java:87)
            at sun.jvm.hotspot.bugspot.BugSpotAgent.setupVM(BugSpotAgent.java:562)
            at sun.jvm.hotspot.bugspot.BugSpotAgent.go(BugSpotAgent.java:494)
            at sun.jvm.hotspot.bugspot.BugSpotAgent.attach(BugSpotAgent.java:332)


    For convenion way, we throw the result to a file.

    Download LibreOffice 7.5.0

    $
    0
    0

    LibreOffice is a free and open-source office suite that provides a range of software tools for office productivity. The latest version, LibreOffice 7.5.0, was released on September 22nd, 2021 and comes with a host of new features and improvements aimed at making the software more user-friendly and versatile. 

    Another major improvement in LibreOffice 7.5.0 is the addition of new features for handling PDF files. This includes the ability to add and edit text, images, and annotations in PDFs, as well as the ability to export PDFs directly from LibreOffice. Additionally, LibreOffice 7.5.0 now supports the creation of PDF forms, making it possible to create interactive PDFs with fillable form fields.

    One of the key changes in LibreOffice 7.5.0 is the introduction of a new and improved user interface. This includes new icons and color schemes, as well as improved menus and dialogs. These changes are aimed at making the software more visually appealing and easier to use. Additionally, the new interface is designed to be more accessible, with support for high-DPI displays and improved text rendering.

    LibreOffice 7.5.0 also includes a number of performance improvements and bug fixes. For example, the software now opens and saves files much more quickly, and it also includes a range of fixes for compatibility issues with other office suite software. Additionally, LibreOffice 7.5.0 includes a number of security fixes, making it a more secure option for users looking for a free and open-source office suite.

    LibreOffice Features

    LibreOffice features are as follow :
    1. Office applications that can be downloaded and installed for free.
    2. Support more than 30 languages.
    3. LGPL Public license, so you can use, modify, and duplicate it for free.
    4. Full support from the free user support community and developer support.
    5. Libre Office is an open source community-driven project, where everyone can participate in developing this program to make it better.
    6. Has almost the same features and benefits as Microsoft Office.
    7. Supports Java, the applications in this program are very compatible with the Java architecture which is most widely used for web designing today.
    8. Easily convert documents created with Microsoft Office programs. Almost all Microsoft Office document formats can be read using LibreOffice.
    9. Switching from the older release of LibreOffice to the latest release is much friendlier than other paid word processing programs. In some other word processing applications, files created with old releases are sometimes difficult to open in the latest release.

    Overall, LibreOffice 7.5.0 is a significant step forward for the software, and it's sure to be well-received by users who rely on it for their office productivity needs. Whether you're looking for an alternative to proprietary office software, or you simply want a free and open-source solution that's packed with features and functionality, LibreOffice 7.5.0 is definitely worth checking out.

    Download  Download LibreOffice 7.5.0

    The file can be found at LibreOffice officila page which is located at https://www.documentfoundation.org/.

    uTorrent 3.6.0 Build 46674: A Comprehensive Overview

    $
    0
    0

    uTorrent is one of the most popular torrent clients available today, with a user base of millions of users across the globe. The latest version, uTorrent 3.6.0 Build 46674, offers a number of new and improved features to enhance the overall user experience. In this article, we'll take a comprehensive look at what this new version has to offer and why it's worth your time to upgrade.

    The User Interface
    One of the most noticeable changes in uTorrent 3.6.0 is the updated user interface. The interface has been refreshed with a new design and new icons, making it easier to navigate and use. The new design is more user-friendly, making it easier for new users to get started with the software and for experienced users to find the features they need.

    Performance and Efficiency
    In addition to the updated user interface, uTorrent 3.6.0 also features several performance improvements to make the software faster and more efficient. The software now uses fewer resources, making it less demanding on your system and allowing you to use it on older or lower-spec systems. Additionally, the software has been optimized for use with the latest hardware, making it faster and more responsive.

    New Features
    uTorrent 3.6.0 also introduces several new features to help users better manage their torrent downloads. One of these new features is the ability to add torrents from the command line. This allows users to automate the process of adding torrents, making it easier to manage large numbers of torrents. Additionally, uTorrent 3.6.0 also features an improved torrent management system, which makes it easier to track the progress of your downloads and to view detailed information about each torrent.

    Security
    uTorrent 3.6.0 also features several security improvements to help keep your torrents secure. The software now features support for encrypted torrents, which helps to protect your privacy and to keep your downloads safe. Additionally, the software has been designed to be more secure against malware and other security threats. uTorret 3.6.0 can be downloaded at https://www.utorrent.com.


    Conclusion
    uTorrent 3.6.0 Build 46674 is a comprehensive upgrade that offers a range of new and improved features to help you better manage your torrent downloads. Whether you're a new user or an experienced user, this new version offers something for everyone, making it a great choice for anyone looking for a reliable and efficient torrent client. So, why not upgrade to uTorrent 3.6.0 today and experience the new and improved features for yourself!

    Pokemon GO 0.261.1

    $
    0
    0


    Pokemon GO is a popular augmented reality game developed by Niantic for mobile devices. In the game, players can explore the real world and capture virtual Pokemon creatures that appear on their screens. The Pokemon GO 0.261.1 version of the game was released in 2021 and contains a variety of updates and new features to enhance the player experience.

    One of the key additions in Pokemon GO 0.261.1 is the introduction of Mega Evolution. In the game, players can now Mega Evolve certain Pokemon to increase their stats and give them more power in battles. The Mega Evolution feature allows players to evolve their Pokemon beyond their regular forms, giving them a new look and making them more powerful in battle.

    Another notable feature in Pokemon GO 0.261.1 is the addition of new Pokemon to the game. With each new version of the game, Niantic introduces new Pokemon for players to capture and add to their collection. In Pokemon GO 0.261.1, players can now catch new Pokemon from the Kalos region, which is featured in the Generation VI games. This addition to the game offers new challenges and opportunities for players to catch and collect different Pokemon.

    The Pokemon GO 0.261.1 version of the game also includes several improvements to the user interface. For example, players can now view their Pokemon's stats and movesets in a new, more streamlined way, making it easier to manage their collection. Additionally, the map in the game has been updated with new markers and information, making it easier for players to find their way and discover new Pokemon.

    Overall, the Pokemon GO 0.261.1 version of the game offers a variety of exciting new features and improvements that are sure to be enjoyed by players of all ages. Whether you're an experienced player or a newcomer to the game, Pokemon GO 0.261.1 is a great way to experience the world of Pokemon in an entirely new way.

    Game Pokemon Go is a moment for fun nostalgia to treat fans' longing for the cute Pokemon figures that used to adorn all of your friends' childhoods.Considering that this game raises various types of Pokemon monsters from the first generation that are very familiar to fans such as Pikachu, Bulbasaur, Squirtle, Charmander, Caterpie, Ninetales, and many others.The players must actively move to explore the surrounding environment in order to hunt various other pokemon.Through the Nerby option, players can see what types of monsters are around them. 

    Meanwhile, to collect important items such as pokeballs, potions, and other crucial items, players must visit the nearest checkpoint known as a pokestop.After collecting lots of cute monsters in the Pokedex, players can then sell via the transfer feature in the application, make them stronger with the level up feature, or take advantage of evolution, namely changing into new types of Pokemon.

    Download
    The Pokemon GO 0.261.1 can be downloaded at Niantic Inc

    NoxPlayer 7.0.5.2 : Emulator For Game

    $
    0
    0


    NoxPlayer 7.0.5.2 is a powerful Android emulator for Windows and Mac. It provides users with a seamless and fast experience of running Android games and apps on their computer. This latest version of NoxPlayer comes with several new features, improved performance, and bug fixes, making it an excellent choice for anyone who wants to enjoy Android apps and games on their computer.

    One of the standout features of NoxPlayer 7.0.5.2 is its ability to run games and apps smoothly and without lag. This is thanks to the use of the latest virtualization technology, which enables the emulator to use the full potential of the computer's hardware resources. This results in a smooth and seamless experience, making it ideal for gaming.

    In addition to gaming, NoxPlayer 7.0.5.2 is also great for productivity apps, such as office tools, social media apps, and communication apps. With the ability to run multiple instances of the emulator, users can have multiple Android environments running at the same time, making it possible to use multiple apps and games simultaneously.

    Another great feature of NoxPlayer 7.0.5.2 is its support for both Windows and Mac operating systems. This makes it an ideal choice for anyone who uses both Windows and Mac computers, as they can enjoy the same great experience on both platforms.

    In conclusion, NoxPlayer 7.0.5.2 is an excellent Android emulator for Windows and Mac, offering users a fast and seamless experience for running Android games and apps on their computer. With its powerful virtualization technology, support for multiple instances, and support for both Windows and Mac, NoxPlayer 7.0.5.2 is definitely worth considering for anyone who wants to enjoy Android apps and games on their computer.


    Brocade X7 Directors

    $
    0
    0


    Brocade X7 Directors are high-performance data center switches designed for organizations seeking to build scalable, efficient, and highly available networks. They are part of the Brocade X7 product family, which provides a comprehensive set of data center networking solutions.

    The Brocade X7 Directors provide organizations with advanced features that are essential for modern data center networks. They feature high-density 10/25/40/100 GbE interfaces, which provide flexible and scalable bandwidth options to meet the demands of high-performance data center applications. The X7 Directors also support Brocade’s patented ICX technology, which enables organizations to build large-scale, high-performance, multi-layer data center networks.

    In addition to their performance and scalability, the Brocade X7 Directors also provide organizations with a high degree of availability. They feature dual-active control planes, which provide real-time redundancy and minimize downtime. The X7 Directors also support Brocade’s Virtual Cluster Switching technology, which enables organizations to create multiple virtual switches within a single physical switch, providing increased network resiliency and reducing downtime.

    Brocade X7 Directors also provide organizations with advanced security features to protect against cyber threats. They feature built-in firewall capabilities, which can be used to enforce security policies and protect sensitive data. Additionally, the X7 Directors support the Brocade Advanced Policy Manager (APM), which provides a centralized management platform for security policies and enables organizations to enforce consistent security policies across the network.

    In summary, the Brocade X7 Directors are high-performance, scalable, and highly available data center switches that are designed to meet the demands of modern data center networks. They provide organizations with advanced features for performance, scalability, availability, and security, making them an excellent choice for organizations seeking to build efficient and reliable data center networks.

    More information about Brocade X7 Directors can be found at official Broadcom website.

    Active IQ Unified Manager 9.9

    $
    0
    0

    Active IQ Unified Manager 9.9 is a software solution developed by NetApp to provide a centralized and unified platform for managing the various storage, data protection, and backup components within an enterprise's IT infrastructure. The solution provides a comprehensive set of management tools and capabilities, including real-time monitoring, health and performance assessment, predictive analytics, and troubleshooting. With Active IQ Unified Manager, administrators can have a comprehensive view of their entire storage infrastructure, including storage arrays, backup systems, and data protection solutions.

    One of the key features of Active IQ Unified Manager is its ability to proactively monitor storage health and performance, identify potential issues, and provide real-time insights into the root cause of problems. This helps administrators to resolve issues before they become critical and prevent costly downtime. The solution also provides a set of automated tools to help with capacity planning, performance optimization, and data protection.

    Active IQ Unified Manager is designed to work seamlessly with a wide range of storage technologies, including hybrid and all-flash arrays, cloud storage, and backup solutions. It supports various platforms, including Windows, Linux, and VMware, and is compatible with various storage protocols, including Fibre Channel, iSCSI, and NFS.

    The software provides a user-friendly web-based interface that enables administrators to manage their storage infrastructure from a centralized location. The interface is highly customizable and can be configured to display real-time performance metrics, health status, and alerts, as well as provide access to detailed reports and analytics.

    In conclusion, Active IQ Unified Manager 9.9 provides a comprehensive and unified solution for managing storage, data protection, and backup within an enterprise's IT infrastructure. With its real-time monitoring, predictive analytics, and automated troubleshooting capabilities, it helps organizations to ensure the availability and performance of their storage infrastructure, and prevent costly downtime.

    More information about Active IQ Unified Manager 9.9 can be found on official NetApp website.


    How to Reboot Ubuntu Using Command-Line

    $
    0
    0
    To reboot Ubuntu using the command-line, you can use the reboot command. Before using this command, it's recommended to save any unsaved data and close any open applications to avoid data loss.

    Using reboot Command Line

    Here's how to reboot Ubuntu from the command line:
    1. Open the Terminal by pressing Ctrl + Alt + T on your keyboard.
    2. Type the following command in the Terminal and press Enter:    

    sudo reboot

    Note: The sudo command is used to run the reboot command with administrative privileges. You will be prompted to enter your password to continue.
     

    3. After entering your password, the system will initiate a reboot. All open applications and services will close, and the system will restart.

    Using shutdown Command Line

    We can also use the shutdown command to reboot your system. To do this, type the following command in the Terminal. The syntax for the "shutdown" command is as follows:

    sudo shutdown -r now

    The -r option is used to specify a reboot, and the now option is used to specify that the action should occur immediately.

    shutdown -h [time] [message]

    Here, -h stands for "halt", and time is the time in minutes after which the system should shut down. The message is a message that will be displayed to all logged-in users before the system shuts down.

    Key Features in NetBackup 10.0

    $
    0
    0

    1. Integrated SaaS protection - Provide unified data protection and monitoring across all your applications and environments.
    2. Kubernetes cross-platform, multi-cloud recovery - Manage protection and recovery with precision across your entire multi-cloud environment.
    3. Integrated IT analytics foundation - Enhance backup performance and reporting while mitigating risks and reducing costs.
    4. Elastic Cloud Autoscaling for AWS and Azure - Dynamically adjust cloud compute resources to meet demand and workload requirements, reducing average utilization by 40%.
    5. Orchestrated backup and recovery for AWS and Azure - Backup and recover with agentless, cloud-optimized data recovery supporting backup from snapshots and multi-tier replication.
    6. Active cyber defenses for ransomware resilience - Near-real-time, AI-driven anomaly detection and on-demand malware scanning to ensure zero-ransom and clean recovery of data.

    Source : https://www.veritas.com/protection/netbackup/whats-new#


    How To Create Backup Policy Using Netbackup10.0.x For One month

    $
    0
    0

     This is only a sample on creating backup policy on  Netbackup during one month.

    To create a backup policy for one month using Veritas NetBackup 10.1.x, you would follow these steps:

    1. Start the NetBackup Administration Console: Open the NetBackup Administration Console on your computer and log in using your administrator credentials.

    2. Define the Backup Policy: In the NetBackup Administration Console, navigate to the Policies section, right-click on the Policies folder and select New > Policy. Give the policy a name, such as "Monthly Backup Policy" and select a Backup Schedule that best fits your needs.

    3. Select the Clients: In the Clients section, select the clients you want to be included in the backup policy. You can select multiple clients by holding down the Control (Ctrl) key while clicking on the clients.

    4. Select the Backup Types: In the Backup Types section, select the types of backups you want to perform. For a monthly backup, a Full Backup is typically the most appropriate choice.

    5. Select the Backup Selections: In the Backup Selections section, select the files and folders you want to include in the backup. You can include specific files, folders, or entire file systems.

    6. Configure the Retention Settings: In the Retention section, configure the settings for how long you want the backup data to be stored. For a monthly backup, a retention of 30 days is typical.

    7. Save and Apply the Policy: Once you have completed the policy, click on the Save button to save the policy. Then, right-click on the policy and select Apply.

    8. Monitor the Backup Job: Monitor the backup job to ensure it runs successfully. You can view the status of the job in the Jobs section of the NetBackup Administration Console.

    By following these steps, you can create a backup policy for one month using Veritas NetBackup 10.1.x. It is important to regularly test your backups and ensure that you can recover data in the event of a disaster.

    How To Install Apache Web Server on Fedora 38

    $
    0
    0


     Introduction

    Fedora is a versatile open-source Linux distribution that is well-suited for a variety of use cases, including both desktop and server environments. It provides a stable and up-to-date platform for running various server applications, including the Apache web server. Whether you're setting up a web server for hosting websites, web applications, or other online services, Fedora can serve as a reliable operating system choice. It's known for its frequent updates and robust package management system, making it a popular choice among Linux users and system administrators.

    1. Update Your System

       It's essential to ensure that your Fedora system is up to date. Open a terminal and run the following commands

      
    $ sudo dnf update

    2. Install Apache

    You can use the dnf package manager to install the Apache web server

     
      $ sudo dnf install httpd

    3. Start and Enable Apache

    After installation, you can start Apache and enable it to start automatically at boot

      
    $ sudo systemctl start httpd
      $ sudo systemctl enable httpd


    4. Configure Your Firewall

    If the Fedora firewall is enabled, you'll need to allow HTTP traffic through the firewall. Use the firewall-cmd command to do this

      
    $ sudo firewall-cmd --permanent --add-service=http
       $ sudo firewall-cmd --reload


    5. Test Apache

    You can check if Apache is running by accessing your server's IP address or domain name in a web browser. You should see the default Apache test page.


    Apache Web server on Fedora operating system

    Configure Virtual Hosts (Optional)

     If you plan to host multiple websites or need to customize your server configuration, you can create Apache virtual hosts. Configuration files for virtual hosts are typically stored in /etc/httpd/conf.d/ or /etc/httpd/conf/httpd.conf.

    6. Secure Your Website (Optional)

        It's highly recommended to secure your website with SSL/TLS if you plan to handle sensitive data or user logins. You can use Let's Encrypt to obtain a free SSL certificate and configure HTTPS for your site.

    7.  Manage Apache

        You can use the following commands to manage Apache
            
            Start Apache :
           
    $ sudo systemctl start httpd
            
            Stop Apache :
           
    $ sudo systemctl stop httpd

            Restart Apache :
           
    $ sudo systemctl restart httpd

     Conclusion

    At this tutorial, we have learned and summarized about Apache installation on Fedora 38 operating system. Remember to check the official Fedora documentation and the specific version's release notes for any changes or additional details, as the procedures may vary based on the Fedora release you are using.


    How To Install Amanda On Ubuntu 22.04

    $
    0
    0


     In this short tutorial we will learn how to install Amanda open source backup application on Ubuntu 20.04 LTS operating system.

    Introduction

    Amanda, short for the Advanced Maryland Automatic Network Disk Archiver, is an open-source backup solution that provides efficient and reliable data backup and recovery capabilities. It's designed to be flexible and scalable, making it suitable for both small and large-scale environments.

    Amanda's Backup Technology Key Features

    Here are some key aspects of Amanda's backup technology:

    1. Client-Server Architecture
    Amanda follows a client-server architecture where a central Amanda server manages the backup process, and client machines send their data to be backed up to the server.

    2. Backup Strategies
    Amanda supports various backup strategies, including full, incremental, and differential backups. This flexibility allows users to choose the backup strategy that best fits their needs in terms of storage space and recovery time.

    3. Disklist Configuration
    The backup targets and settings are defined in a configuration file called disklist. This file specifies which files or directories on the client machines need to be backed up.

    4. Media Management
    Amanda uses a concept called "tapes," which can be physical tapes, virtual tapes, or simply disk storage. The software manages these tapes to organize and store backup data efficiently.

    5. Network Backup
    Amanda excels in network backup scenarios, allowing centralized management of backups for multiple machines connected over a network. This is particularly useful for organizations with distributed computing environments.

    6. Encryption and Compression
    Amanda provides options for encrypting and compressing backup data. This ensures the security of sensitive information and optimizes storage space.

    7. Parallelism
    To improve backup performance, Amanda supports parallelism, allowing multiple backup operations to occur simultaneously. This is especially beneficial in environments with a large number of clients.

    8. Verification and Integrity Checking
    Amanda includes features for verifying the integrity of backup data. The amverify tool can be used to ensure that backups are consistent and can be restored successfully.

    9. Recovery:
    Amanda makes data recovery straightforward. Users can selectively restore files or entire backup sets using the amrestore tool. The recovery process is designed to be user-friendly and efficient.

    10. Community and Support:
    Being an open-source project, Amanda benefits from a vibrant community of users and developers. Users can find support through forums, mailing lists, and documentation.

    11. Plugins and Integration
    Amanda supports plugins that extend its functionality. Integration with other tools and services, such as cloud storage providers, can be achieved through plugins.

    12. Platform Compatibility
    Amanda is platform-independent and can be installed on various operating systems, including Linux and UNIX-like systems.

    How To Install Amanda server On Ubuntu 20.04

    In this section we will learn how to install Amanda-server on Ubuntu 20.04 TLS operating system. We will install Amanda server using APT Ubuntu.

    1. Update System Packages:

    $ sudo apt update
    $ sudo apt upgrade

    2. Install Amanda:

    $ sudo apt install amanda-server

    3. Configuration:

    Amanda uses a configuration file to define backup settings. The main configuration file is typically located at/etc/amanda/<<your-config-name>>/amanda.conf. You may need to create this file based on your specific requirements.

    4. Configure Disklist:

    Edit the disklist file (usually located at /etc/amanda/<<your-config-name>>/disklist) to specify the data you want to back up. Add the paths to the directories or filesystems you want Amanda to archive.

    5. Configure Amanda User Permissions:

    $ sudo adduser amandabackup
    $ sudo adduser amandabackup disk

    6. Start Amanda Services:

    $ sudo service amanda-server start

    7. Verify Amanda Installation:

    Run the Amanda verification command to check if the configuration is correct.

    $ sudo amcheck <<your-config-name>>

    8. Schedule Backups:

    Use the amdump command to start the backup process. You may want to set up a cron job to automate this process.

    Amanda's combination of features, flexibility, and community support makes it a robust choice for organizations seeking a reliable backup solution tailored to their specific needs. Always refer to the latest Amanda documentation for the most accurate and detailed information.

    Viewing all 107 articles
    Browse latest View live